
What are Automations?
Strive automations let you trigger flows with keywords and integrated forms. Member's automatically receive a flow upon submitting a keyword or form.
When an automation is triggered by a supporter, their record is added or updated in your Members list.
What types of automations are there?
- Keyword Automations: Assign keywords to flows. Members are automatically routed to flows when they text in a keyword.
- Integration Automations: Assign synced forms from ActBlue, EveryAction, Facebook, and Action Network to flows. Members are funneled into flows based on the forms they submit.
- Default Automation: Ensure new members receive a welcome response when they message into your number, without requiring them to text in a keyword. If you have an integration set up, your default automation will send to any new members who submit a synced form (that do not have an integration automation configured). You can only create one default automation per campaign.
Note: ActionKit forms cannot trigger the default automation. You must create a integration automation to trigger texts when a user submits an ActionKit form.
Where do I compose messages for Automations?
Messages are composed via the Flows page. Once your flow is ready to automate, you can assign your flow to an automation trigger (keyword, form, etc.). Learn more about building flows.
What are “triggers”?
Triggers are the conditions that will initiate a flow. When setting up an automation, you must create a trigger. A trigger consists of the type of audience you want to receive your flow, and the keyword or form they must submit in order to prompt the flow.
You can configure triggers for the following Audiences:
Any Member: All members, new or existing
New Member: A supporter who's record does not yet exist in your Members list
Existing Member: A member in your Members list
Note: You can only create triggers for new and/or existing members OR any member.
Create a Keyword Automation
Route Members into custom flows when they text in a Keyword.
- Go to Automations under Configurations in the left-hand navigation.
- Make sure you are on the Keywords tab.
- Click Add Automation. A new line in the keyword automations table will be created.
- Add a name for your keyword automation, we suggest something that distinguishes your keyword automation type, like Onboarding.
- Select if this automation is for new or existing members.
- Select the keyword you would like to trigger your flow.
- Next, assign the flow you would like to be triggered by the keyword.
- Last, assign groups. This is optional if you want your keyword automation to funnel members into groups.
- Click Create.
Create an Integration Automation
Route Members into custom flows when they submit an integrated form.
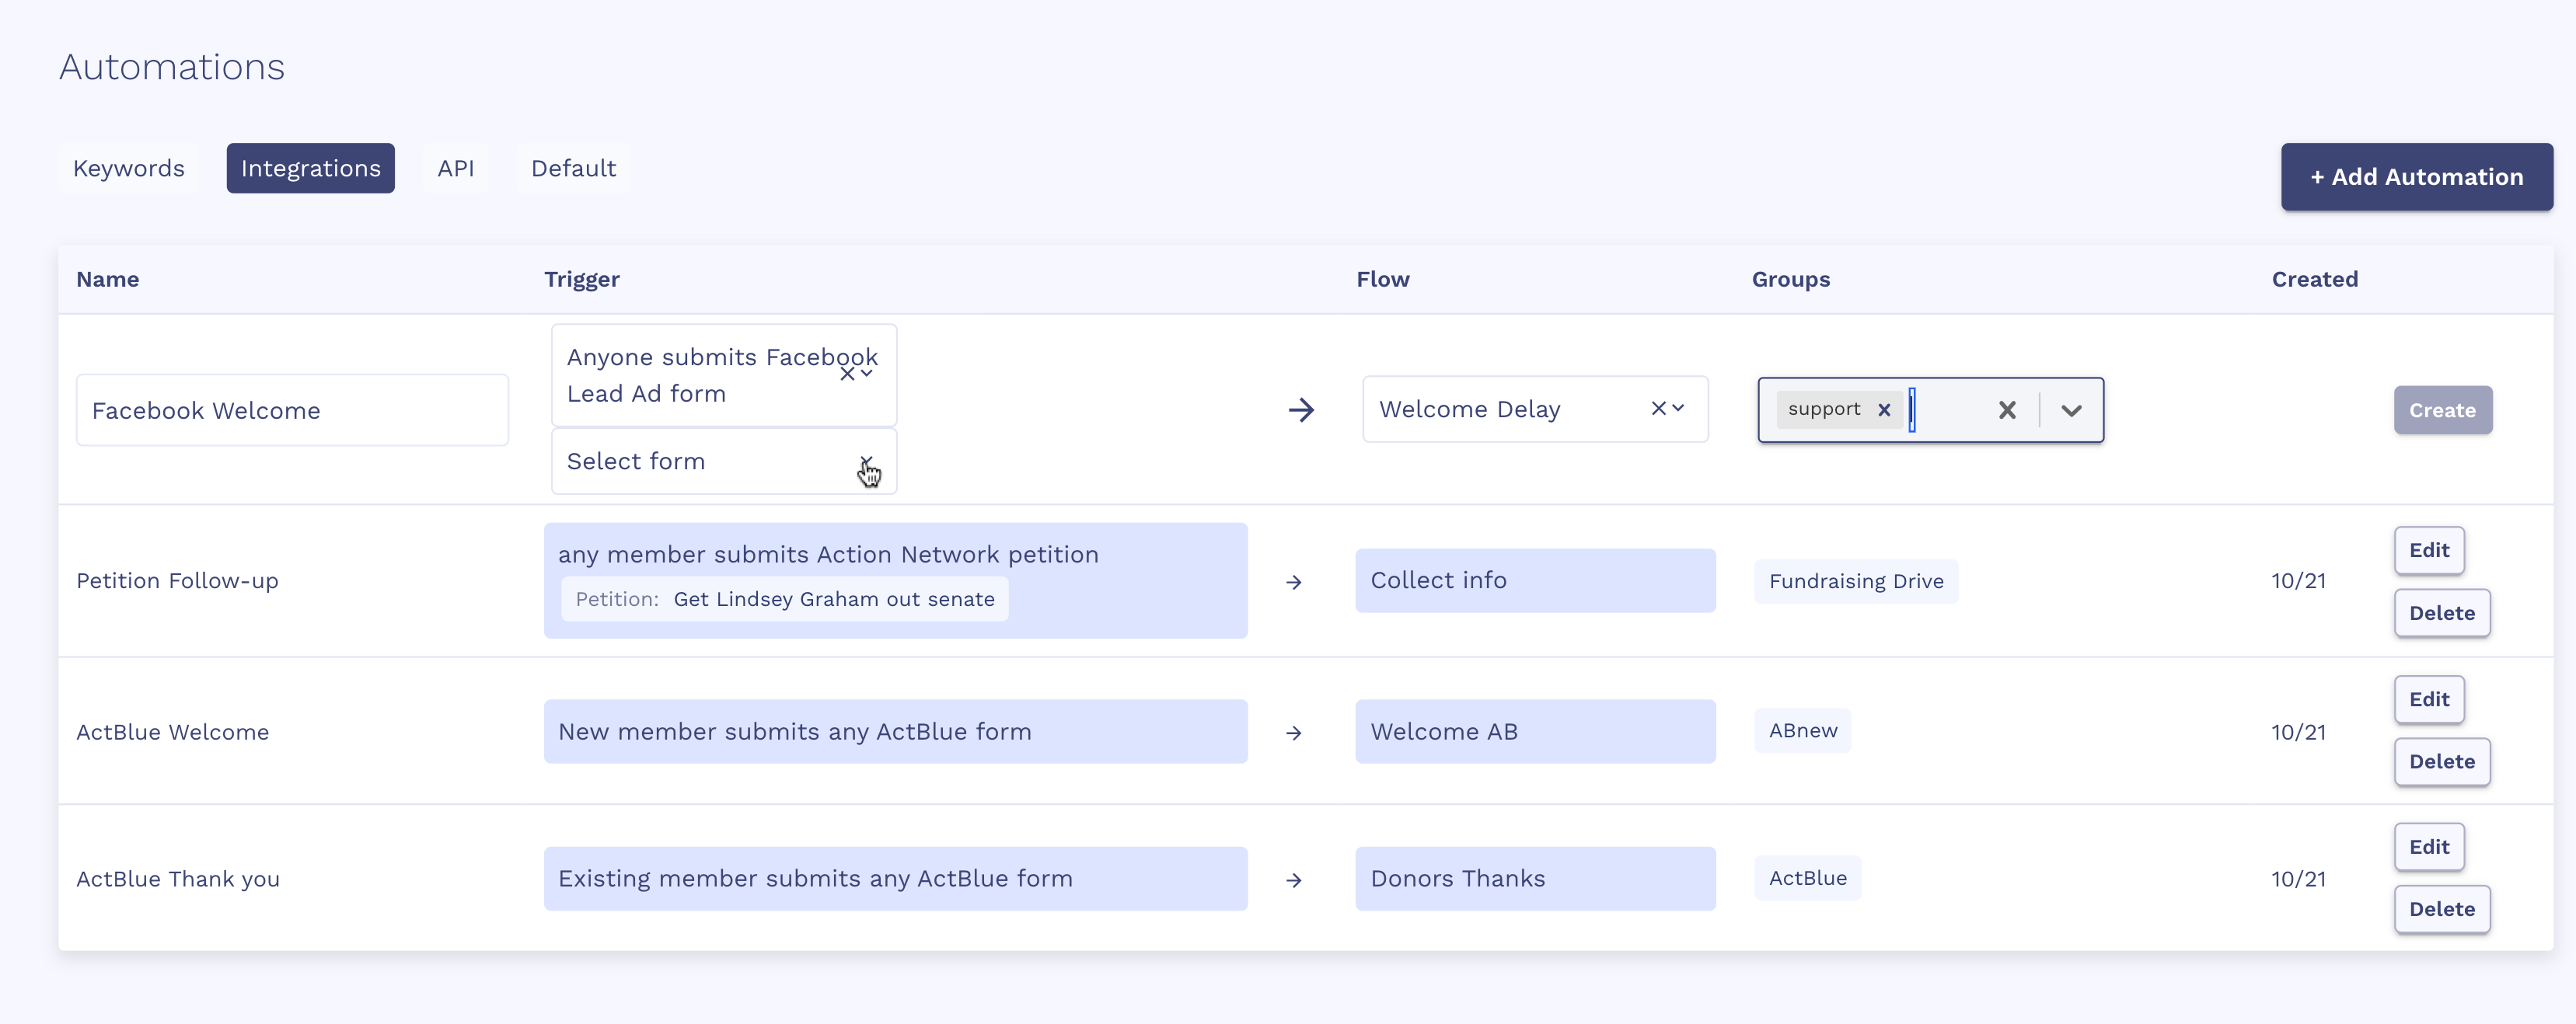
- Go to Automations under Configurations in the left-hand navigation.
- Make sure you are on the Integrations tab.
- Click Add Automation. A new line in the integrations table will be created.
- Add a name for your integration automation. We suggest something that distinguishes your form to flow type, like Action Network Spring Petition.
- Select your triggers by first clicking your integration platform/form type in the drop down menu.
- Click the form you’d like to use as a trigger for your messaging flow in the drop down menu.
- Next, click the flow you’d like your form to trigger.
- Last, assign groups. This is optional if you want your integration automation to funnel members into groups.
- Click Create.
Note: EveryAction Integration Automations can only be triggered once. Multiple form submissions by the same member will not trigger the automation more than once.
Create a Default Automation
Greet new members that message into your number or submit a synced form, without having to create a specific keyword or integration automation. Default automations will send to new members who text in a message that does not match a keyword, or submit a synced form that does not have an integration automation.
- To create a default automation, first, go to the Automations under Configurations in the left-hand navigation.
- Make sure you are on the Default tab.
- Click Add Automation. A new line in the default table will be created.
- Add a name for your default automation, we suggest something that distinguishes your default automation, like Welcome Response.
- Select your trigger. Note: You are only able to create a default automation for new members texting in.
- Select your default flow.
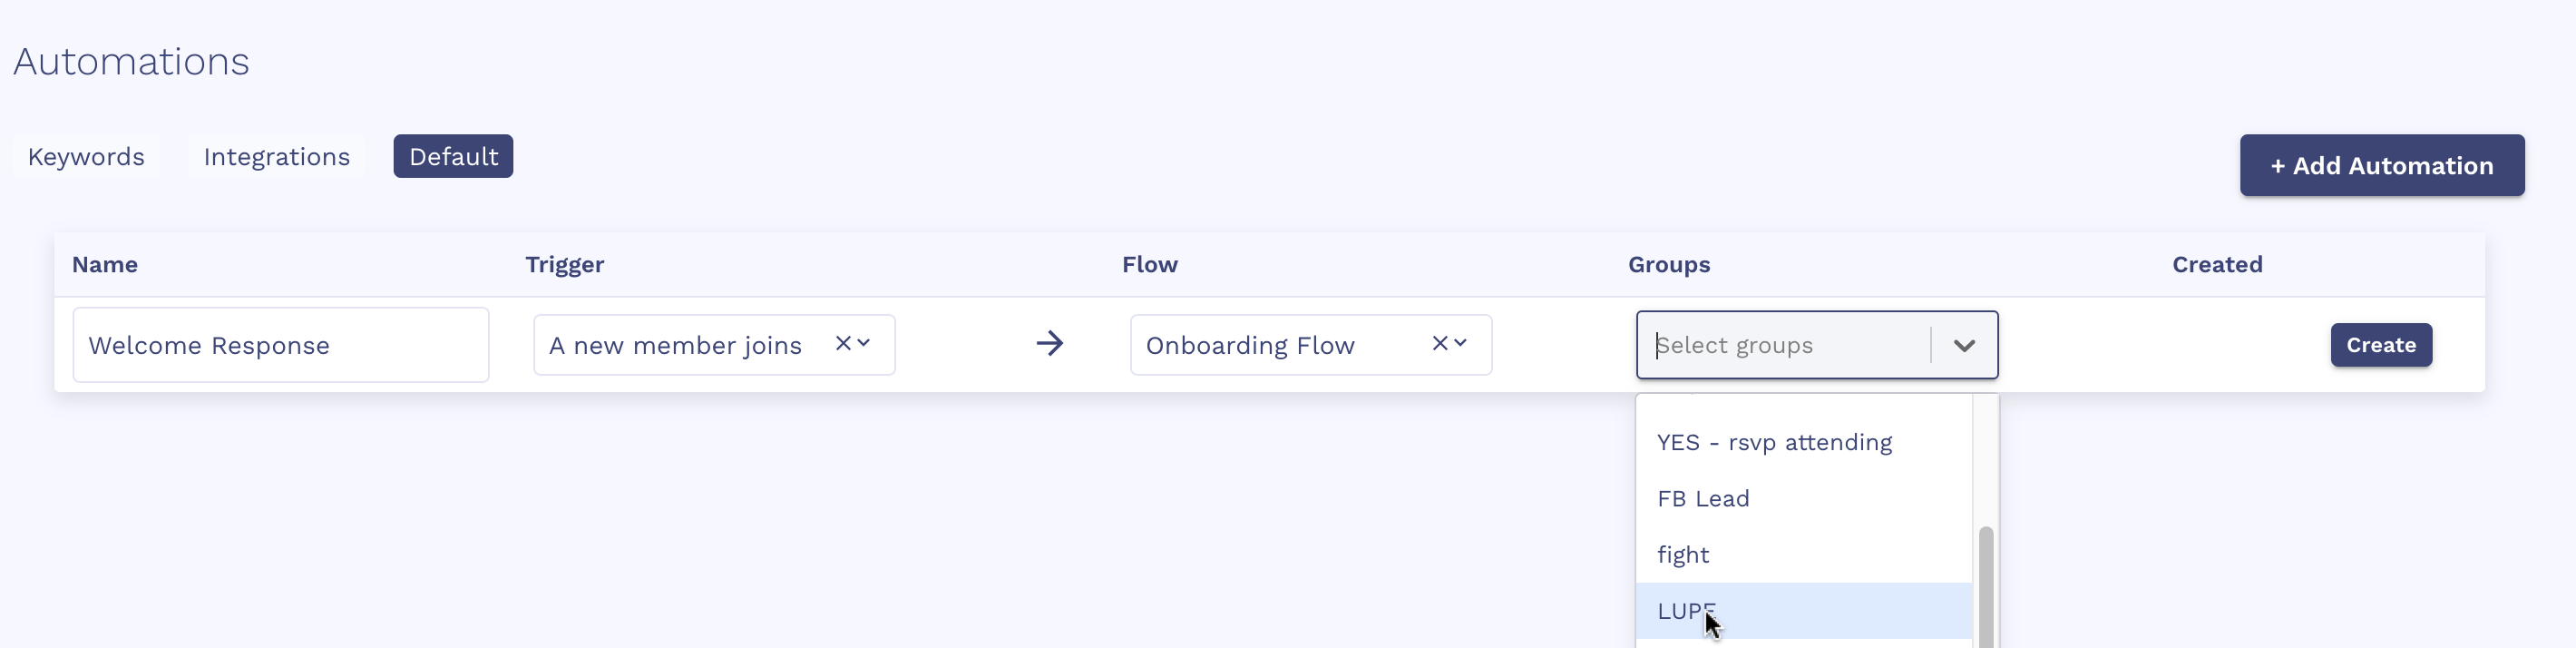
- Last, assign groups. This is optional if you want your default automation to funnel members into groups.
- Click Create.
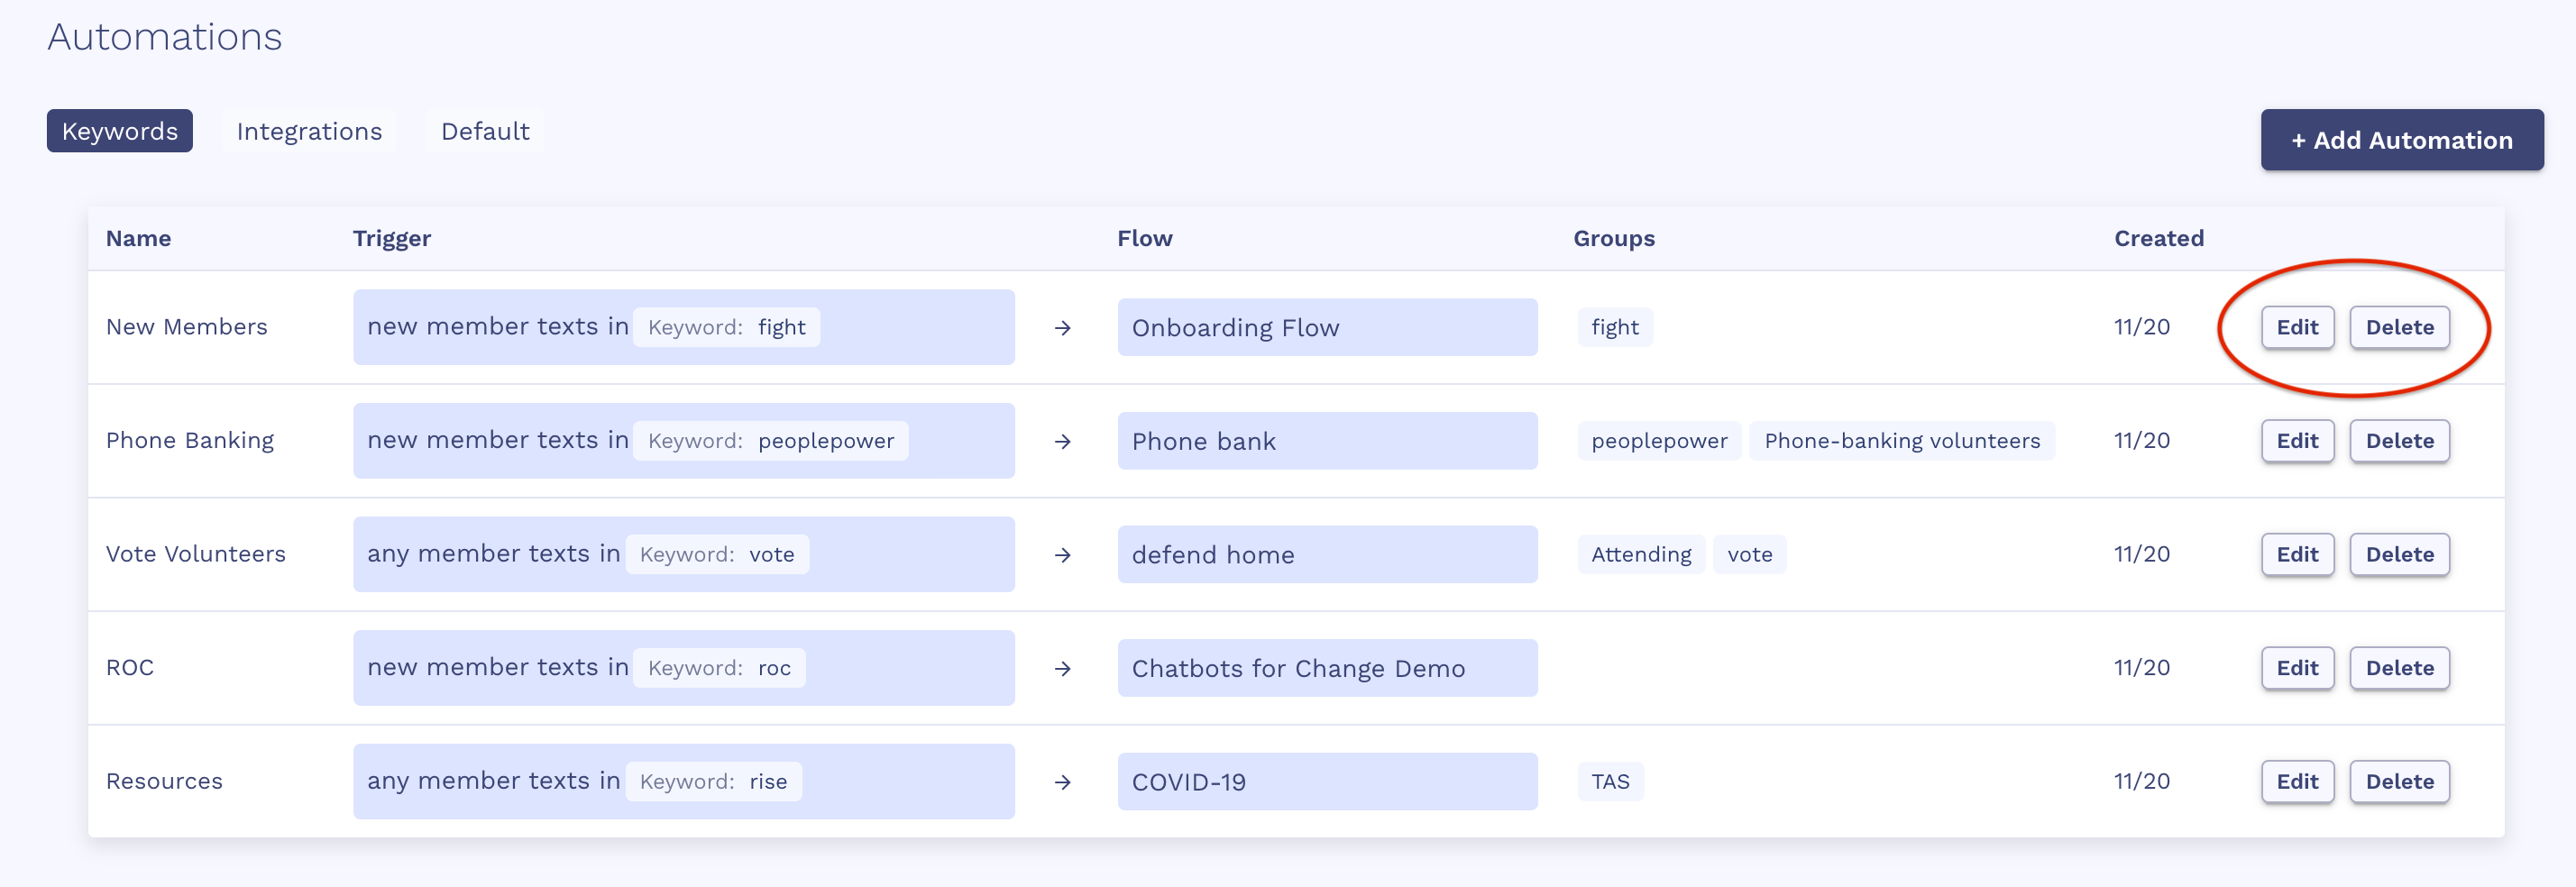
Edit or Delete Automations
- To edit an automation, simply click edit in the actions column on the right hand side in the line of the automation you’d like to edit.
- Once you've finished making adjustments click submit.
- You will now see your automations changes reflected in the line you edited.
- To delete an automation, simply click delete in the actions column on the right hand side on the line of the automation you’d like to delete.
- Click confirm, to confirm your deletion.
With automations you have a full view of live messaging flows and the rules set for each of those flows. Automatically trigger conversations, segment new and existing members into groups, and more!


.svg)
.svg)

.png)